 |
 |
 | |
This lesson discusses conic sections and some alternative methods of looking at them. The mathematics of conics does not start until Lesson 2.
Section 1_1
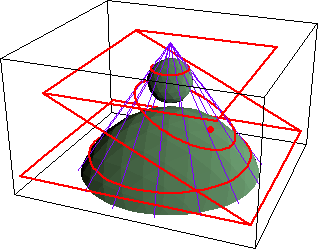
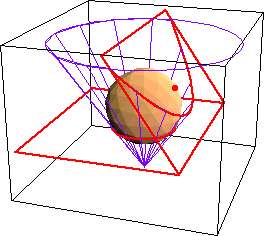
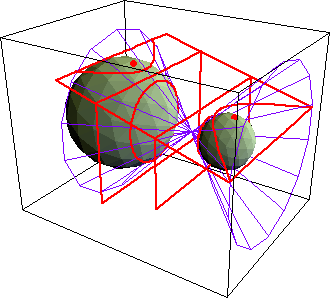
A conic section is the curve formed by intersecting a cone with a plane. There are three different conic sections: ellipses, hyperbolas and parabolas. The circle is sometimes mentioned as a conic section also but it is actually just a special case of the ellipse (when a and b are both 1). The conic section cone is slightly different than the cones studied in geometry. The conic section cone is formed by rotating one of two intersecting lines about the other. The fixed line is called the axis of the cone; the point of intersection of these lines is the cone's vertex. The conic section cone has two parts, called nappes. If the plane is parallel to the top or bottom of the cone, the curve will be an ellipse as long as the plane does not pass through the vertex of the cone. If the plane passes through the vertex, the curve is just a point. If the plane is not parallel to the top or bottom of the cone, does not pass through both nappes of the conic section cone and is not parallel to the side of the conic section cone, the curve formed is an ellipse. If the plane is parallel to the side of the ellipse and not concurrent with the conic section cone, the curve is a parabola. If the plane is concurrent with the side of the conic section cone, the curve is a line. Finally, if the plane passes through both nappes (but is not concurrent with the side of the conic section cone) of the conic section cone, the curve is a hyperbola. All of this information about conic sections can be seen in the three images below.
 |
 |
 | |
Take a piece of wax paper about ten inches square. Draw a circle on this wax paper of arbitrary size but do not make it really small or really large. Choose a random point somewhere inside this circle and label this point F. Make sure you mark this point clearly. Now, fold the wax paper so that this point lies on the circle that you drew earlier and crease it . Continue folding the point F onto the circle but in different positions on the circle. After thirty or so folds you should see an outline of an ellipse. The figure below is an example of what you should see.
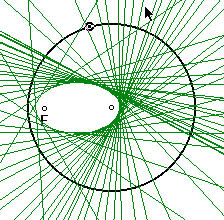
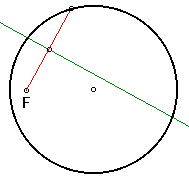
Let us now represent what was occurring in Section 1_2, with a GSP animation. How would we construct this ellipse using GSP? First, draw the circle and choose a random point inside the circle and label this point F. Whenever we folded the wax paper, the crease in the wax paper was located half way between F and the point on the circle that you folded F onto. We need to construct this line on GSP. To do this, choose a random point on the circle and draw the segment between F and that point. Find the midpoint of this segment. We know that the crease in the wax paper passes through the midpoint point because it is half way between F and the point on the circle that we are folding F onto. We also know that if we take any two point on a segment and fold them onto each other, the crease in the paper when these two points are on each other is perpendicular to the segment. Therefore, if we construct a perpendicular line through the midpoint that we found, this perpendicular line will represent the crease in the wax paper. The image below illustrates this construction.
